Setup Chatness AI with WhatsApp Cloud API
Chatness supports the official WhatsApp Business API. You can connect the phone number and have your Chatness bot managing your WhatsApp customer queries right away. You can also jump in anytime and take over the conversation from your Chatness Threads.
Follow the steps given below to connect your Chatness bot with WhatsApp Cloud API.
Chatness currently only supports text based messages. Media messages are not supported yet.
Configure your Facebook Developer App
First of all you'll need to create your Facebook Developer app with the WhatsApp Product enabled. Go to the WhatsApp Cloud API Guide, then navigate to the section called Set up Developer Assets and Platform Access and follow the steps.
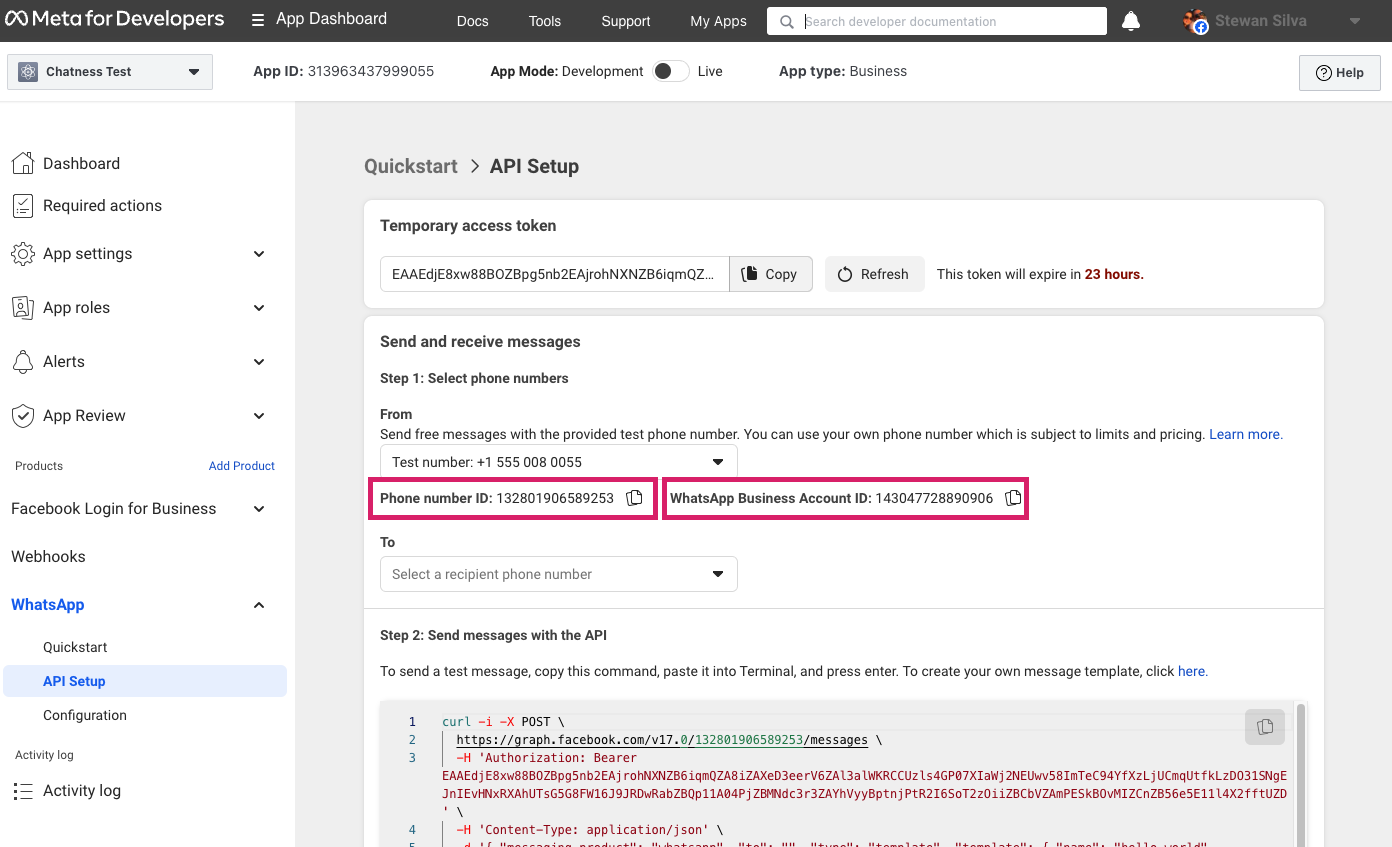
Once you finish the step, you should be assigned a phone number for tests.
Obtain the Phone Number Id and Whatsapp Bussiness Account ID as shown in the above screenshot.
Chatness will require these values later.
Create a system user from your Meta Business Manager
System users represent servers or software that make API calls to assets owned or managed by a Business Manager. You'll need to create a system user to represent your Chatness bot and grant it access to your WhatsApp Business Account.

- Go to Business settings.
- Below Users, click System users.
- Click Add new system user.
- Give a name to the system user (eg: Chatness) with admin role and then click Create system user.
- Click Generate new token.
- Select your app, set token expiration to Never and check the permission
whatsapp_business_messaging. Then click Generate Token. - Save this token somewhere safe. You will need it later.
Assign assets to your system user
Now you need to add assets from your WhatsApp Business Account to the system user you just created.
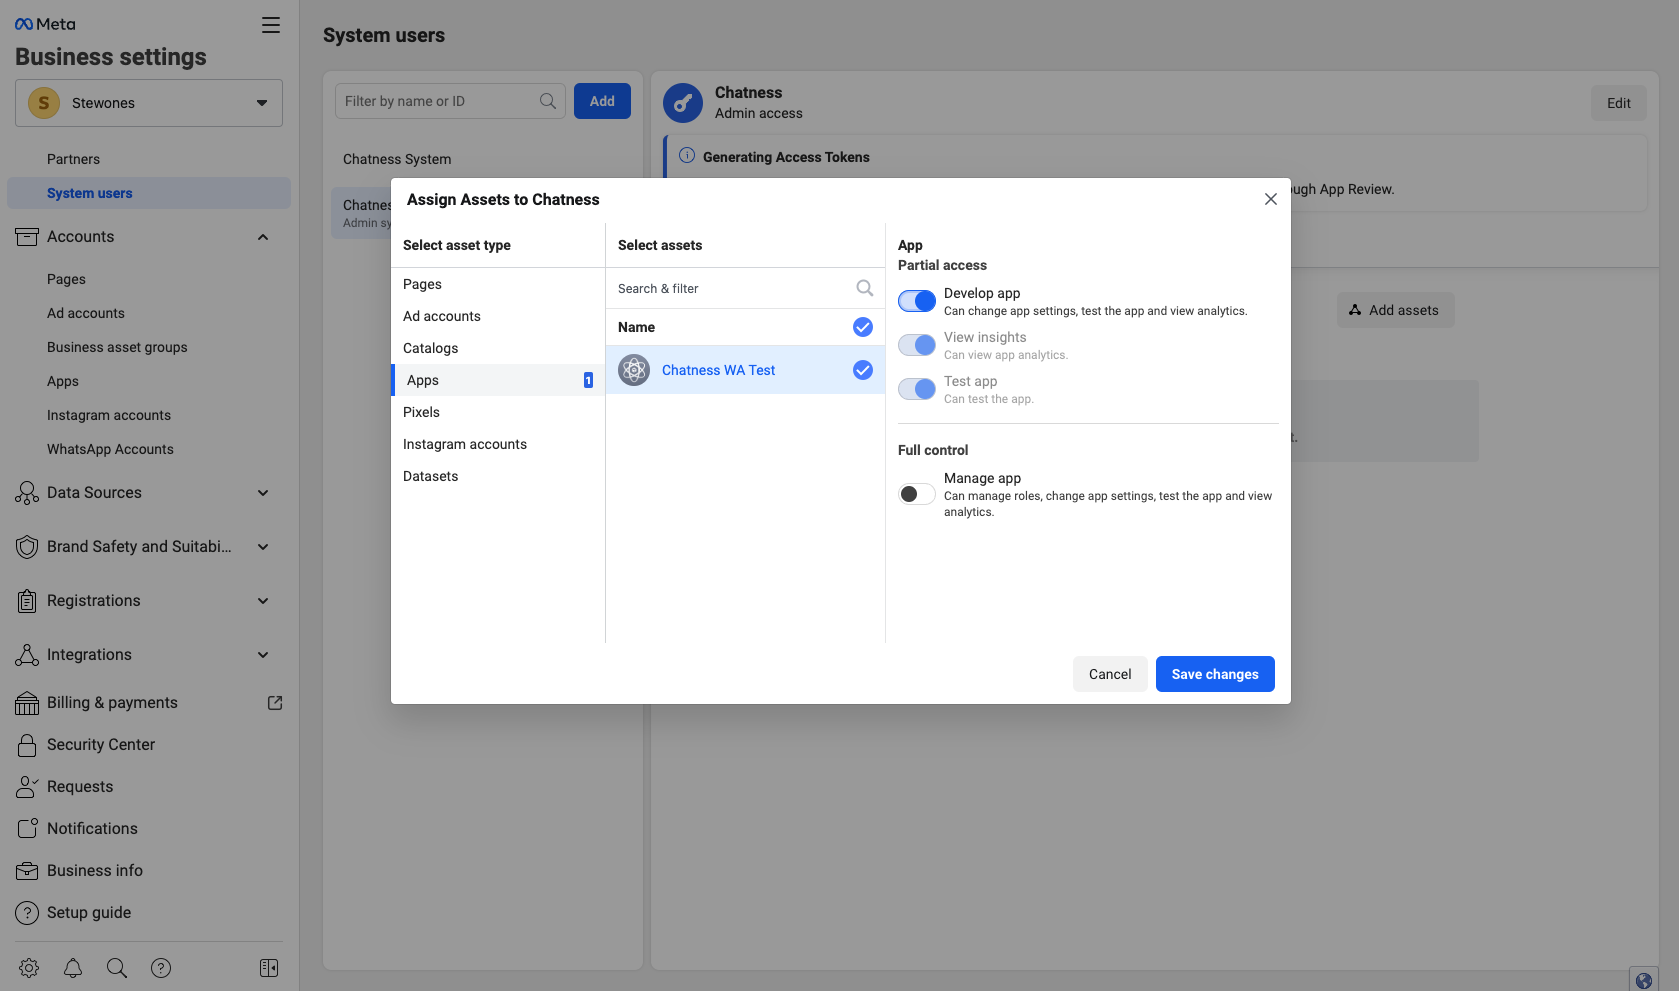
- Go to Business settings.
- Under System users click on the system user you just created.
- Click the button Add assets.
- In the Select asset type, select Apps and select your app.
- In the Partial access section, activate the Develop app option and hit Save changes.
Add Chatness Webhook to your App
The Chatness Webhook is a URL that Facebook will call when a new message is received. You'll need to add this URL to your Facebook Developer App.
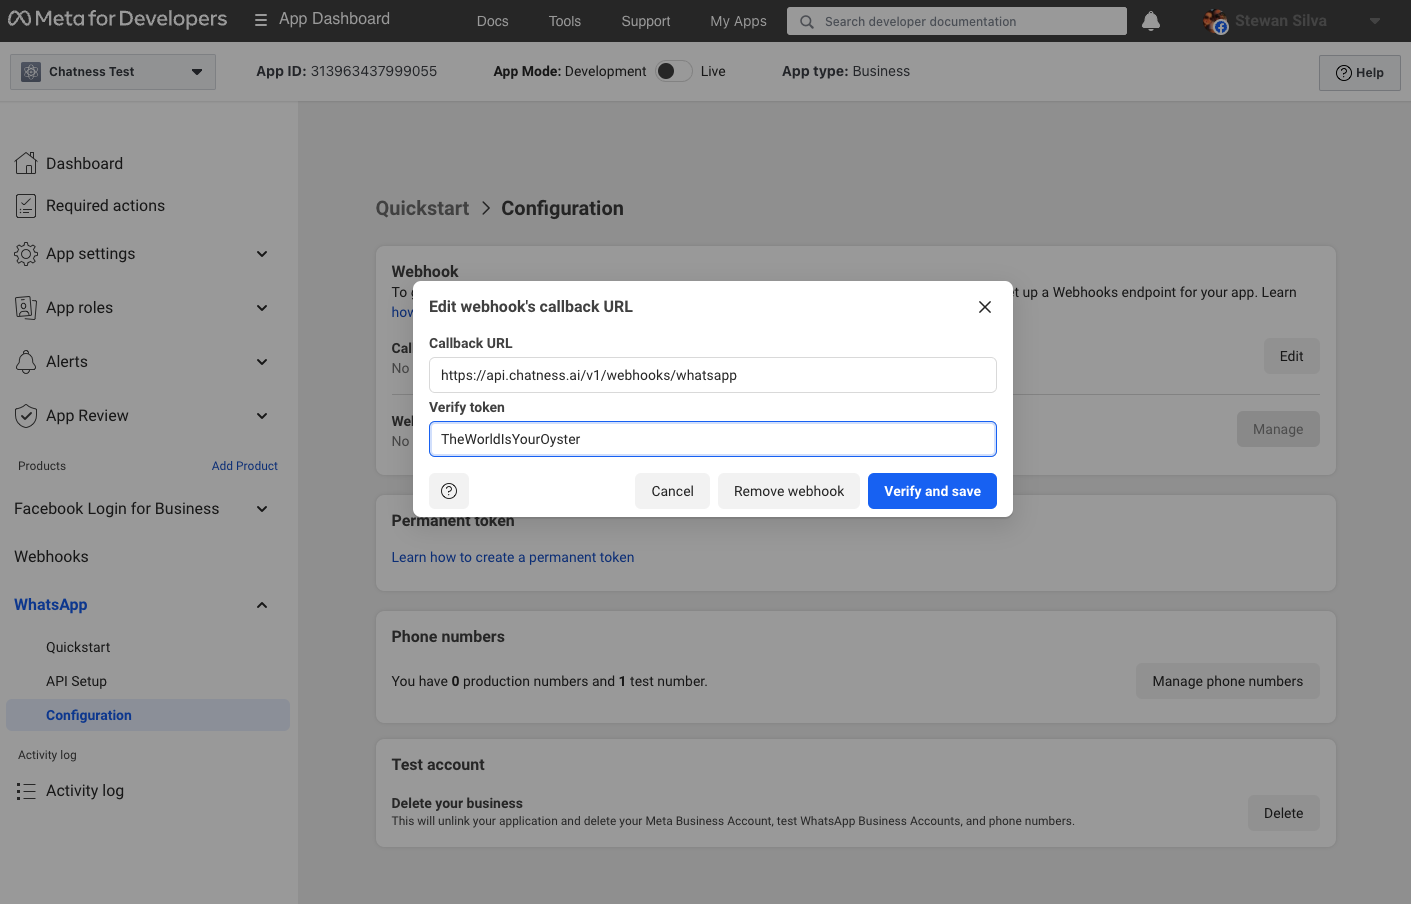
- Go to the developer portal and select your app
- Under WhatsApp click on Configuration
- In the Webhook card, click the Edit button and add the following URL:
https://api.chatness.ai/v1/webhooks/whatsapp - Add a random string to the Verify token field
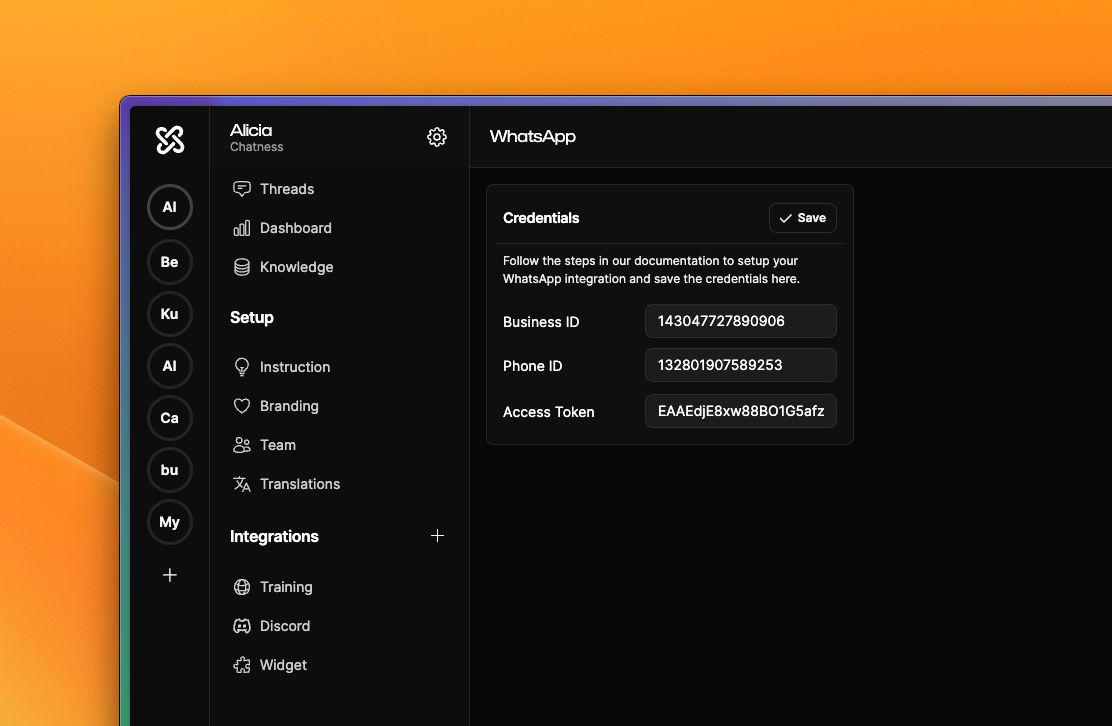
- Before clicking Verify and Save, head to the Chatness Integration for WhatsApp and fill the fields with the values you obtained in the previous steps. After saving the integration on Chatness, you can go back and hit Verify and Save in the Facebook Developer Portal.
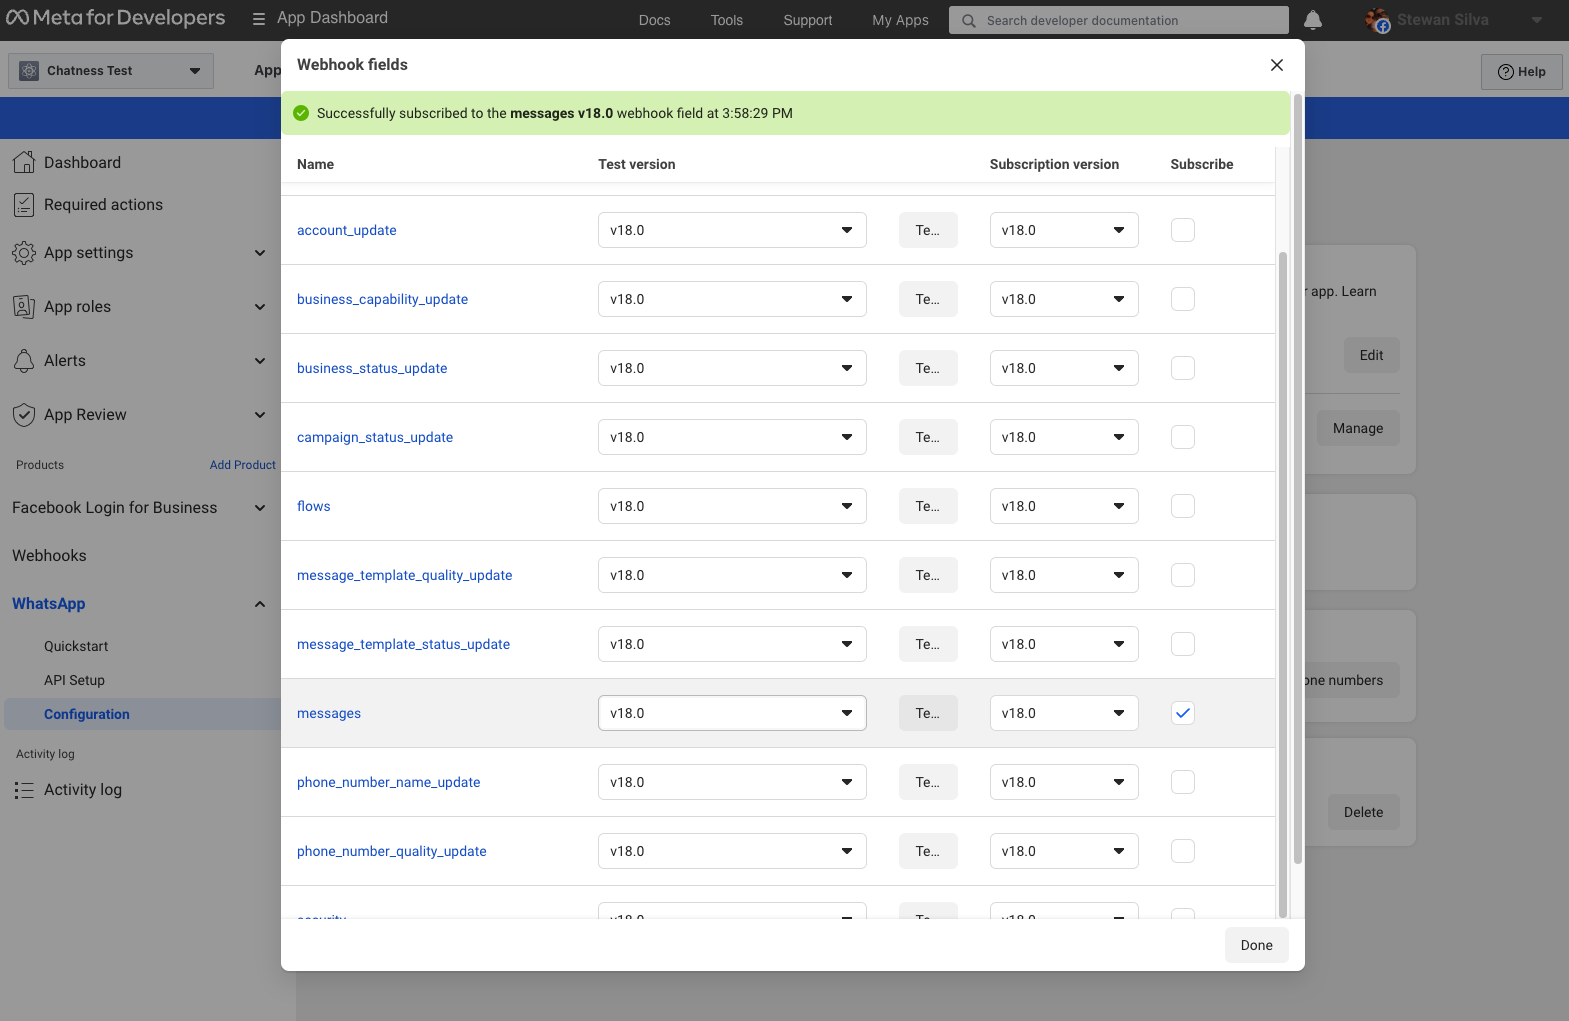
- While in the Webhook card, click the Manage button to select the fields you want to receive in the webhook. Currently Chatness requires only the
messagesfield. Then click Done.
Testing your integration
- Go to the Meta for Developers portal and select your app.
- Under WhatsApp click on API Setup.
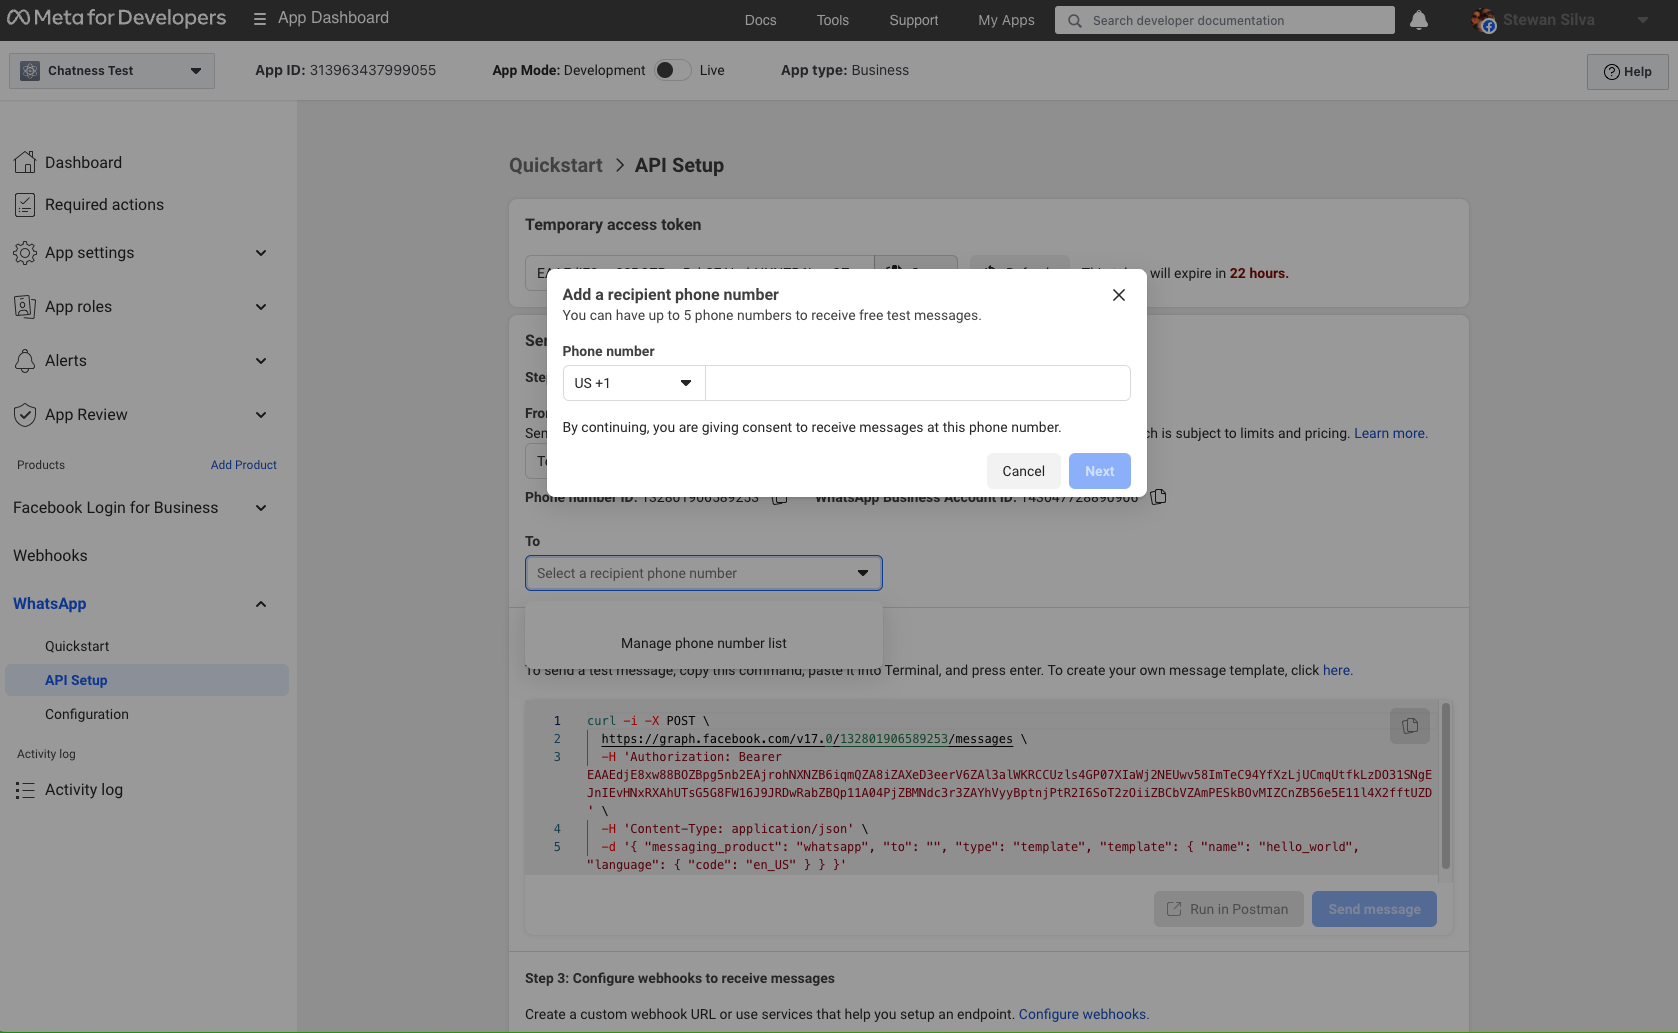
- In the Send and receive messages card, click the Select a recipient phone number under the To field.
- Click Manage phone number list
- Add your test phone number and click Next.
- You should receive a verification code in your phone. Enter the code and click Next.
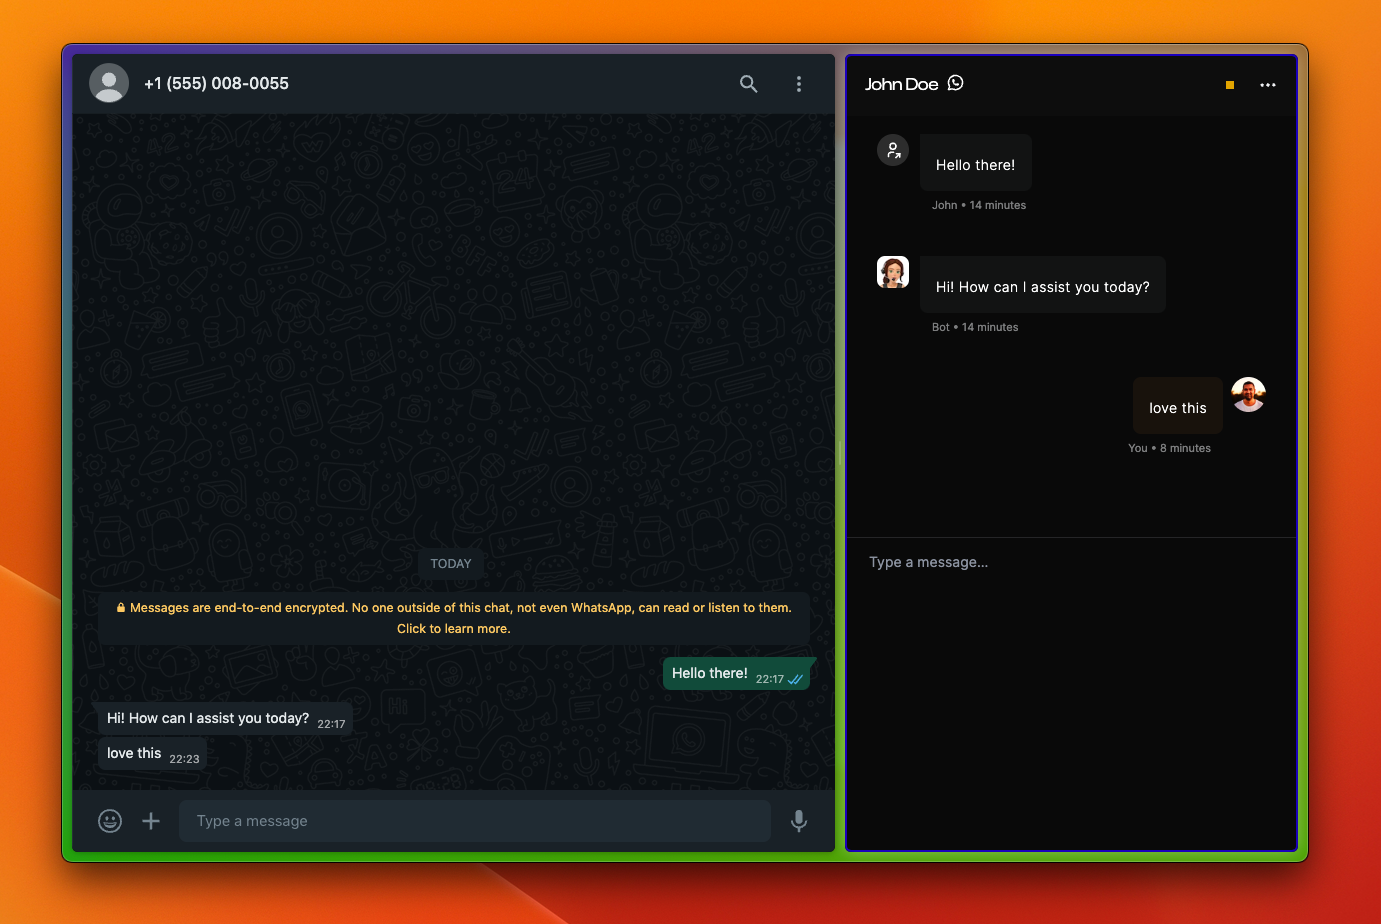
At this point your should be able to test the integration, go to the WhatsApp web or app using the actual phone number you just added and then try to send a message to the Test number you received from Meta. The message should be handled and replied by your bot and appear in Chatness Threads. Remember you can always jump in and take over the conversation.
Informing users about your automated experience
To send messages to a person on WhatsApp, the conversation must be initiated by that person. When required by applicable law, automated chat experiences must disclose that a person is interacting with an automated service:
- at the beginning of any conversation or message thread,
- after a significant lapse of time, or
- when a chat moves from human interaction to automated experience.
Automated chat experiences that serve the following groups should pay special attention to this requirement:
- California market or California users
- German market or German users
Acceptable disclosures include but are not limited to: "I’m the [Page Name] bot", "You are interacting with an automated experience", "You are talking to a bot", "I am an automated chatbot."
Even where not legally required, we recommend informing users when they’re interacting with an automated chat as best practice, as this helps manage user expectations about their interaction with your messaging experience.
Here's how you can enforce this requirement in Chatness:
- Go to your bot in Chatness.
- Click the Instruction button under Setup
- Add the following piece to the System Prompt
Always introduce yourself as an automated experience. eg: "Hello! I'm Alicia, a virtual assistant from Chatness. How can I help you today?"